Growing Blog
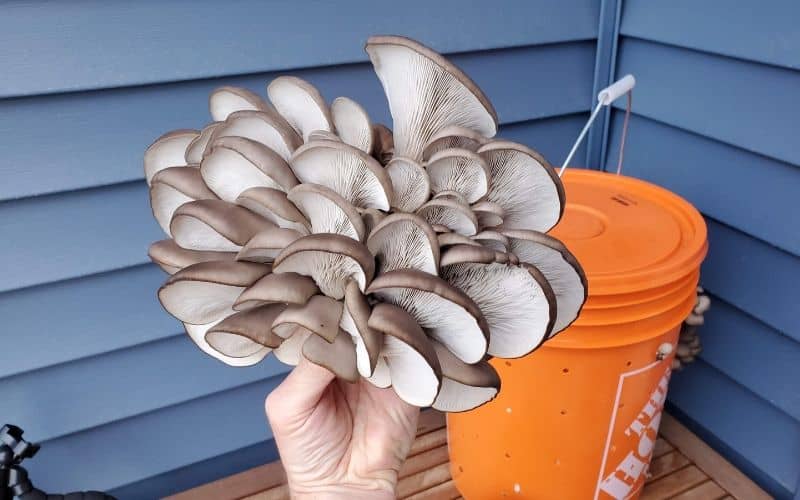
Grow Mushrooms Easy In A 5 Gallon Bucket

Contents
- Why a Five Gallon Bucket?
- 5 Gallon Bucket Mushroom Grow
- WHAT YOU NEED
- STEP BY STEP
- Step 1: Drill Holes in a Plastic 5 Gallon Bucket
- Step 2: "Lazy" Pasteurization of Wood Chips
- Step 3: Cool Overnight / Drain
- Step 4: Add Spawn To The Wood Chips
- Step 5: Colonize In A Cool Dark Place
- Step 6: Fruit
- Step 7: Harvest and Second Flush
- FAQ and Troubleshooting
I often get asked- “what’s the easiest way to grow mushrooms at home?”
And to be honest, the true answer depends on your specific situation.
For example…
Do you have a flow hood? Have you tried growing mushrooms before? Do you have access to spawn?
If you are already a little confused, don’t fret!
In this post, I’ll go over how to grow mushrooms in a 5 gallon bucket, which is one of the easiest and most fruitful methods for growing mushrooms- that almost anyone can do at home.
Why a Five Gallon Bucket?
I’ll admit, growing mushrooms can get complicated… but it doesn’t have to be that way.
Sometimes it can be dirt simple- and that’s why I love the 5 gallon bucket method.
- It requires no special skills or previous experience.
- It requires no expensive and specialized equipment.
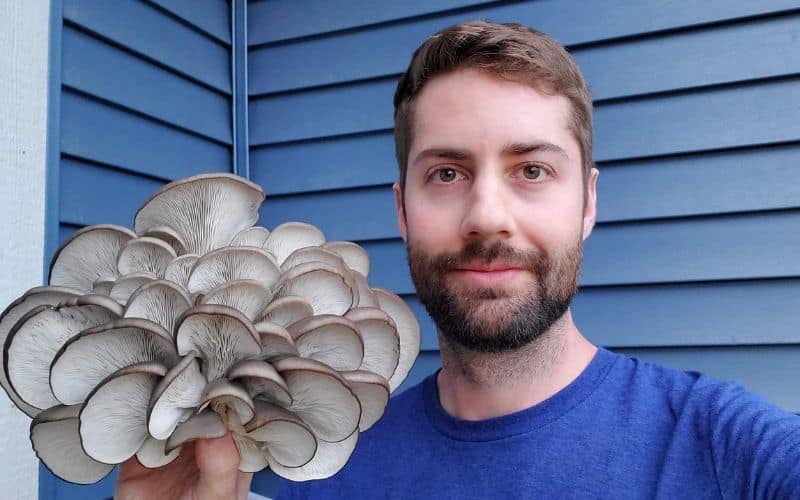
- It can produce a metric whack-ton of fresh mushrooms at home, with little effort.
So… are you ready to grow lots of fresh mushrooms at home?
Me too.
Let’s get started!
5 Gallon Bucket Mushroom Grow
Let’s start by first outlining a few things that you’ll need to get, and then go over the step by step method for growing mushrooms in a 5 gallon bucket.
Keep in mind that these are mostly suggestions and stuff that has worked well for me. For every piece of equipment and step in the process, there is likely an alternative that will work just as well. If you have your own methods, feel free to let me know in the comments below!
WHAT YOU NEED
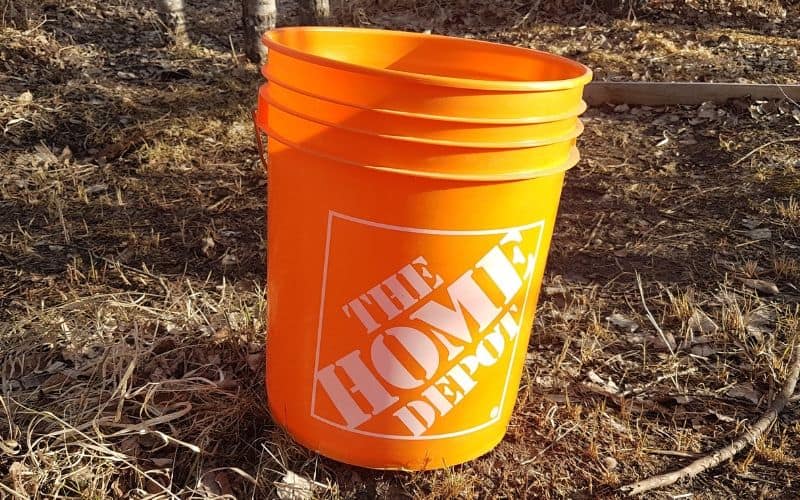
1. Five Gallon Bucket With Lid
The bucket will act as the “fruiting container” to hold the substrate that the mushrooms will grow from.
You can easily find these buckets for relatively cheap at Home Depot, Lowes, or any other hardware store.
You can also use any old bucket you may have laying around your house- but be mindful of the chemicals that might have been in there before.
If you’re planning on eating your mushrooms it may be best to start with a clean new bucket. Also, make sure to get a lid for your bucket so you can seal it off while the mushrooms are colonizing.
2. Power Drill With A ¼” Bit
You’ll need a drill with a ¼” bit to punch holes all around the bucket.
Some prefer to use a larger bit, (or even a hole saw) but I have found the most success with these smaller 1/4″ holes.
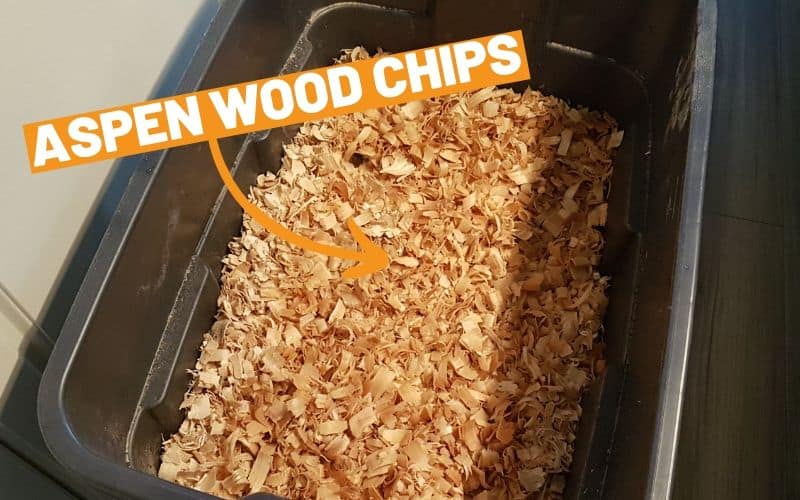
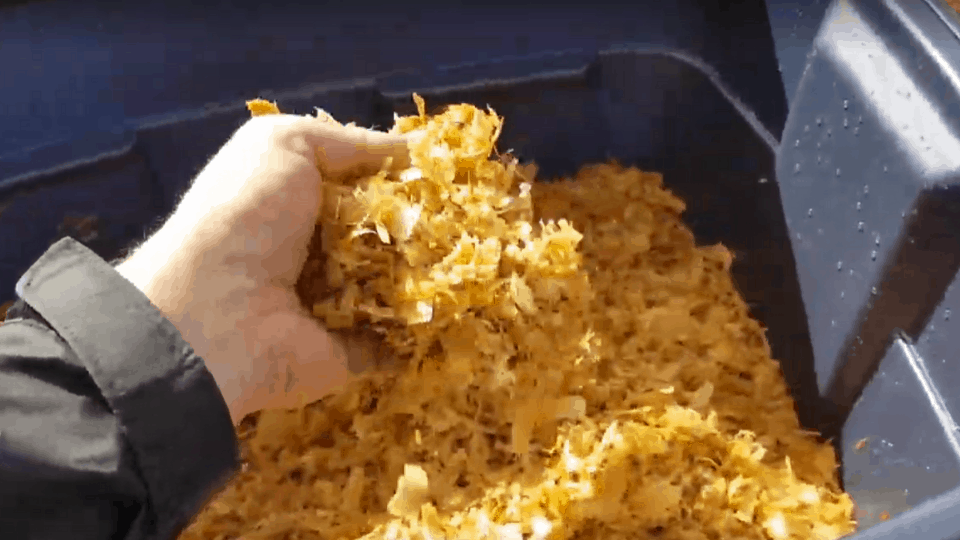
3. Aspen Wood Chips
The wood chips will be the substrate for your mushrooms to grow on.
You can use most hardwood species, it doesn’t necessarily have to be aspen. Use what you have access to.
The reason I suggest Aspen is because you can often find them at your local pet store, where they are sold as bedding for hamsters and other small animals.
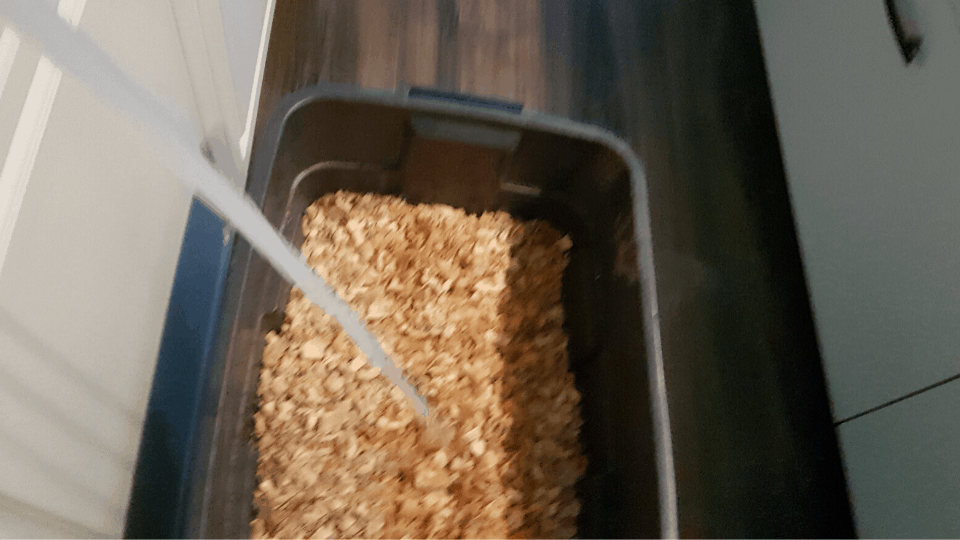
4. Large Plastic Tote
This will be used to soak the chip in hot water.
Get on that is around 13 gallons or so, which should be plenty of room to soak your chips.
Of course, you can soak your chips in other five gallon buckets, in your bathtub, whatever works… I just like the tote because it’s clean and easy to use.
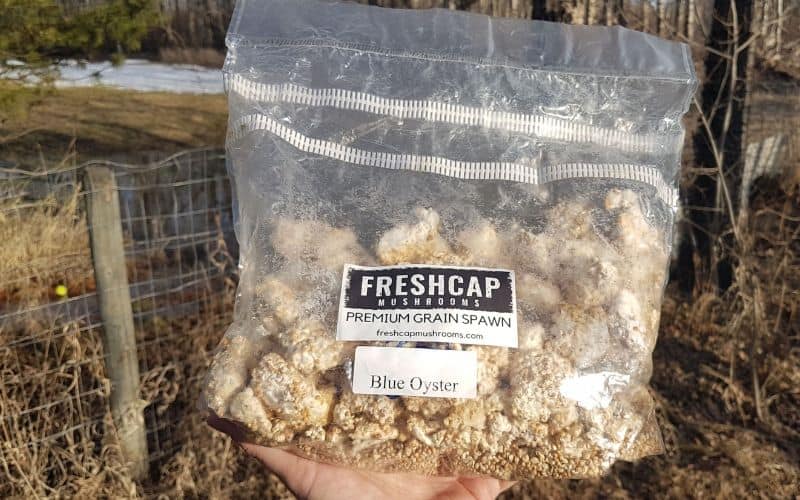
5. Oyster Mushroom Grain Spawn
This is the crucial ingredient!
If you have some experience, you can make your own spawn, but for most starting out, it’s easiest to get pre-made spawn.
You’ll want to get your spawn from a trusted supplier (send us a message for recommendations) and be sure to have a plan ready to use your spawn soon after you get it.
Spawn will stay good on a shelf or in the fridge for a while, but fresher is always better… keep that mycelium running!
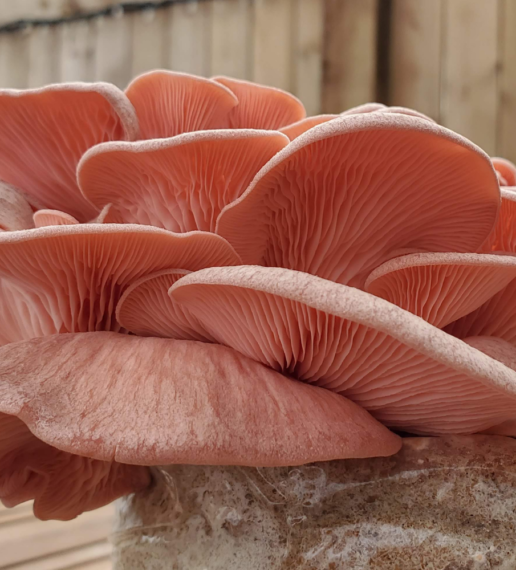
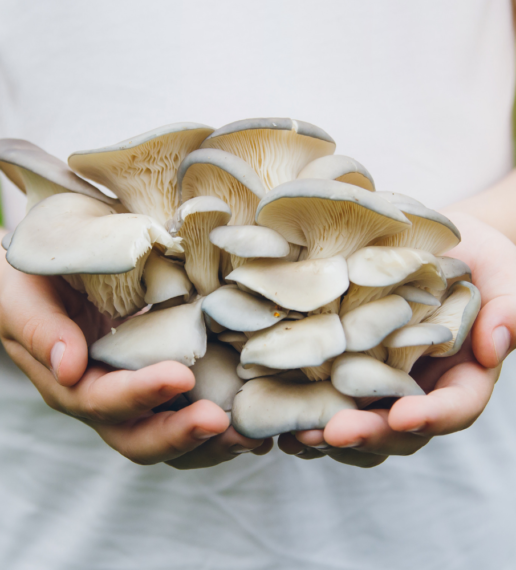
Most Oysters species will work great, specifically Pink Oysters, Blue Oysters and Pearl Oysters.
You may be able to grow other species this way (Lion’s Mane for example) but it’s best to stick to something prolific and aggressive like oysters, especially if it’s your first grow.
Plus, Oyster mushrooms are absolutely delicious, so it’s not like you are compromising….
6. Other
It also doesn’t hurt to ensure you have a spray bottle for keeping your mushrooms moist, and a spare kitchen trash bag for covering your bucket while it’s colonizing.
STEP BY STEP
Gathered all your materials?
Great- it’s time to grow some mushrooms!
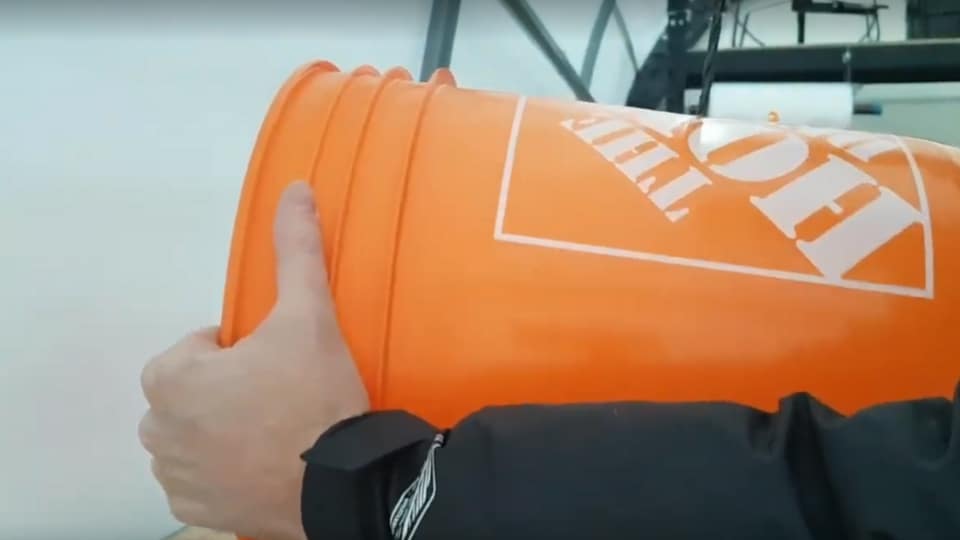
Step 1: Drill Holes in a Plastic 5 Gallon Bucket
First step is to drill holes all around the outside of your bucket. There’s no exact science here, just drill holes every few inches all the way around.
I find that a ¼” drill bit works great- it’s big enough for the mushrooms to fruit from, but not too big as to make the substrate dry out too quickly.
Some people use a hole saw to get larger ½”-¾” holes, but I really don’t think this is advisable.
You can also drill a few smaller holes in the bottom (⅛” or so) to allow excess water to drain from the bottom, but this is not 100% necessary either.
Step 2: “Lazy” Pasteurization of Wood Chips
The reason we use straight wood chips (no added bran, soy ect.) is because the wood chips alone are not likely to contaminate.
You could also use straw, but without a full pasteurization there is a high chance of contamination.
Wood chips can be treated by simply soaking them overnight in hot tap water, as long as your hot water tank is hot enough.
Place the chips in a large tote, and fill with hot water. Your chips will float, so you might need to place something heavy on top to keep them submerged.
The goal is to get the water between 65-85 deg C.
If you can’t achieve that with water from the tap, add a little boiling water from the stove or kettle to bring the temperature up.
Again, this process doesn’t need to be exact.
The purpose of the hot water is two fold:
- It partially pasteurizes the wood chips, killing some of the potential contaminants
- It hydrates and softens the wood chips so they are more easily colonized by the grain spawn
Let your chips sit in the hot water for 8+ hours, or until they have completely cooled off.
Step 3: Cool Overnight / Drain
Leave the wood chips to soak overnight or longer so that they can get sufficiently softened, pasteurized and have a chance to completely cool off.
Adding grain spawn to piping-hot chips will likely kill off the mycelium, so ensure it is cool to the touch.
You’ll also want to drain off the excess water.
The chips should be fully hydrated, but not dripping wet. Do whatever works and makes the least amount of mess. You can drain them down a tub, or even just drain them in your yard.
You can also just drain the chips by squeezing them out as you are adding handfuls to your bucket.

Step 4: Add Spawn To The Wood Chips
It’s time to inoculate your bucket!
To do this, simply build up alternating layers of wood chips and spawn until the bucket is full. Each layer of wood chips should be around 1.5” thick, topped off with a thin layer of spawn.
Again, the science here is not exact.
You want to use a spawn rate of around 5-10%, which means you’ll need about 2.5-5 lbs of grain spawn for each 5 gallon bucket.
A 10% spawn rate will colonize the bucket faster, and comes with a higher chance of success- but you can easily get away with less.
No need to be sterile here, since the wood chips aren’t prone to contamination. You can wear nitrile gloves if you are handling the spawn directly, but it is not necessary.
Step 5: Colonize In A Cool Dark Place
Once the bucket is inoculated in layers, toss a lid on and put it somewhere to colonize. Nothing fancy here- just keep it out of the sun, in a cool location if possible.
Best bet is to put it in a basement or cool garage.
You can leave it in the dark, but that is not crucial- it will still colonize fine if exposed to ambient light.
The important part is that it doesn’t dry out. An easy way to avoid this is to loosely drape a plastic bag over the bucket while it’s colonizing. This will allow the mushrooms to breathe, but help retain the humidity.
Depending on temperatures, spawn rate, and species, your bucket should be fully colonized in 10-21 days. If you want, feel free to take a peek under the lid after a week or so. Dig under the chips and take a look at the mycelium. You should see that it is slowly expanding and working it’s way across the chips.
If you see no growth, or smell anything funky, it means that your bucket was contaminated. This could be from bad spawn, contaminated chips, or poor environmental conditions. If that is the case, it’s time to toss the bucket and try again.
…But that’s not going to happen… right?!?!
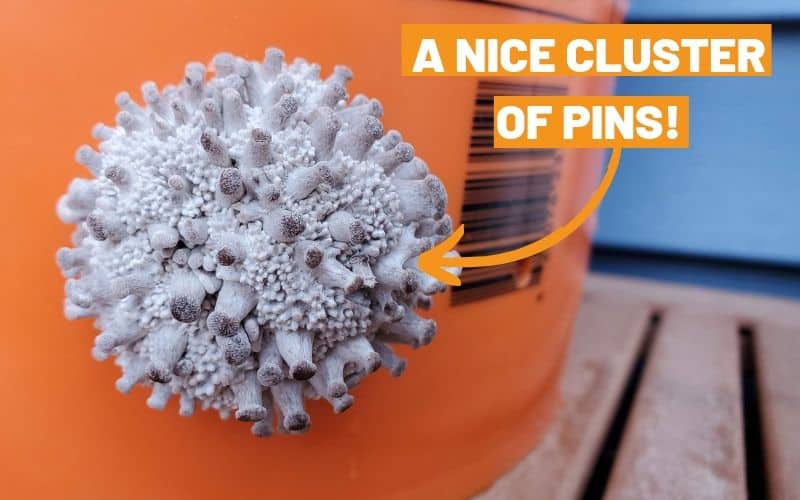
Once the bucket is fully colonized, pins will start to form. You should notice small clusters forming through some of the holes in the bucket.
Once you see this, you know it’s time to fruit!
Step 6: Fruit
Your hard work has paid off and it’s time to fruit the mushrooms.
Wooo hooo!
Where you fruit them depends on your situation, time of year, climate ect…
Personally, I like to fruit them outside in the spring, summer and fall.
Place your bucket in a well shaded area, away from the wind, and preferably somewhere where you can maintain a relatively high humidity.
Some examples of good fruiting locations are:
- In tall grass under the shade of trees
- In a corner of your deck/patio that doesn’t get much sun
- In a shed or garage
The most important thing is to make sure the pins do not dry out. If they get too dry, they will “abort” and fail to grow into full sized mushrooms. If the location you chose is too windy, you can try to drape a plastic bag loosely over the bucket, so that it still has a chance to breathe.
Also, it helps to have a spray bottle handy so that you can soak the mushrooms down a few times per day.
Once they start pinning, mushrooms grow fast! You should expect to go from pins to full sized mushrooms in less than ten days, sometimes even faster.
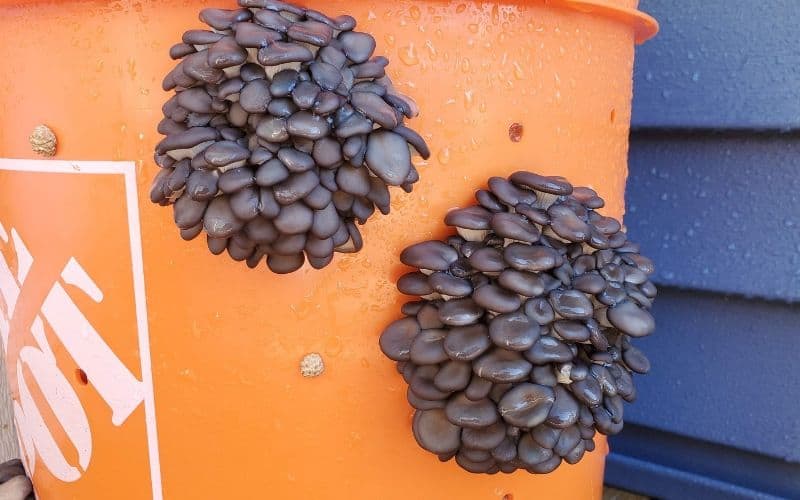
Step 7: Harvest and Second Flush
You’ll know it’s time to harvest the mushrooms when it looks like the caps are starting to curl up.
This is the point when the mushrooms want to release their spores, so you’ll want to make sure you harvest them before that stage.
You can also harvest them earlier.
If you’re growing them outside, harvesting them early reduces the chance of bugs burrowing into and feeding off your fruits.
Harvest the oysters in whole clusters instead of picking them off one by one. The easiest way to do this is to simply cut the whole cluster off at the back against the bucket with a sharp knife.
Now, you officially have the freshest Oysters in town!
You can cook them right away, or store them in the fridge for a few days.
Remember that Oysters do not have a great shelf life, so the earlier you are able to use them the better.
Homegrown Oysters are usually WAY nicer than the ones you get in the stores. That’s because Oysters are relatively delicate, do not travel well, and do not have a long shelf life. You really can’t beat the quality of homegrown oysters.
FAQ and Troubleshooting
Having issues with your grow? Growing mushrooms like this is easy, but it doesn’t always go as smooth as planned.
Here are some common issues and how to resolve them.
+ How Long Does It Take To Colonize?
How long it takes to colonize the bucket depends on temperature, spawn rate (ie. how much spawn you used) and the species of mushroom.
For Oysters on aspen wood chips at a spawn rate of 5-10%, it should take anywhere from 10-21 days to colonize fully.
Cooler conditions will slow the growth, but too warm and they will not grow at all. Anywhere from ~10 deg C- 21 deg C should be just fine.
+ My Oysters Aren’t Pinning
If your Oysters aren’t pinning it could be for a couple of reasons.
1. Your Bucket is contaminated
Did the bucket fully colonize? Check to see if the mycelium has grown through the wood chips. If not, you may have to wait longer or it has become contaminated, in which case it is time to start over.
2. It is too dry
Oysters (and most other mushrooms in general) need a really high humidity to form pins. Try draping a plastic bag over the bucket to maintain a higher humidity, or try spraying near the holes with a spray bottle a few times per day.
+ They Are Aborting
If you see pins, but they stop growing, it is likely because there was a drop in humidity.
Sometimes these pins can be revived with a good spraying, but often if the pins get too dry, they are not going to grow anymore. Any “aborted” pins can just be picked off the bucket.
+ When Can I Harvest?
Harvest the mushrooms is usually best right before the caps start to curl up, indicating that they are done with the life cycle and about to drop spores. After they drop spores, the quality of the fruits will decline rapidly. Sometimes it’s better to harvest the mushrooms long before this stage.
+ What About Bugs
Bugs can be a problem depending on the time of year you’re growing and where you’re located.
In my area (Central Alberta) we can get gnats that burrow into the fruit and lay eggs, and eventually degrade the fruit completely.
The only real way around this is to harvest the fruits before they get a chance to ruin them. Before cooking them up, slice a few in half to ensure they are not full of these gross bugs.
+ Can I Get A Second Flush?
Mushrooms just have so much to give!
Leave your bucket in a suitable location and you are very likely to get a second, third or even fourth “flush” of mushrooms.
Alternatively, you can remove the wood chips from the bucket in myceliated “discs” and lay them in a garden to get more mushrooms through the summer and fall.
+ Can I Use Straw Instead?
Oyster mushrooms will grow well on a variety of substrates, including straw, coffee grounds, soy hulls and much more.
I would not recommend straw for this method unless you are able to do a more thorough pasteurization using a large 55 gallon drum. The reason for this is that straw is not nearly as clean as wood chips and there is a much higher chance of contamination.
Keep in mind, this is from personal experience, so your mileage may vary.

Growing Pink Oyster Mushrooms At Home (Easy Backyard Grow)
Pink Oysters mushrooms are one of the easiest species to grow. They are fast to colonize, produce a ton of fruits and aren’t at all afraid of less than perfect conditions. I just recently finished a fun backyard grow, and wanted to share how easy it is to produce a fresh bounty of one of
7 Tips for Beginner Mushroom Growers
New to growing mushrooms? If so, you may just be a little mystified – which is totally understandable. There is a ton of information to try and digest and make sense of. Terms like inoculation, agar transfers, laminar flow- what does all of this mean? And what of all this do I really need to know? I just want
Great article! Can the same thing be done with hardwood fuel pellets, or would they need to be pasteurized with either lime or heat?
Thanks! I have down something similar with hardwood pellets, but in a tray instead of a 5 gallon bucket- worked great. So I assume this would also work pretty good with hardwood pellets, but can’t say for sure. I imagine it would be significantly more dense and heavier which may affect your results.
I’m trying to grow blue oyster mushrooms in a 5 gal. bucket right now using supplemented hardwood sawdust pellets. It’s day 17 from inoculation and no pinning yet. The sawdust is beautifully colonized and it smells really good with mycelium on the holes. It’s taking so long though. What do you think is going on?
Thank you for sharing your knowledge.
Btw could you please share your tray and sawdust tek-the measurements of your ingredients etc. thanks again!
Hi Tony.
Thanks for this really informative article and the great work you’ve done.
With this method what does the myelium and mushrooms feed off? Normal sawdust method requires soy bean hulls etc. Does the bucket method also require that?
Thanks so much
Thanks for checking it out! For this method, no bran or additional nutrition is required… Oyster mushrooms will happily feed off the wood chips alone. They are primary decomposers and can feed off lignin, which is why they will grow from fallen logs or trees. Remember aswell that this method uses grain spawn, so there is some asdditional nutrition from that as well- although it is already colonized so does not pose a contamination risk for the most part.
The normal sawdust method doesn’t really require bran or soy either… but it does help with yield, speed of colonization ect., which is why it is used. The downside is that supplemented sawdust needs to be sterilized.
Just got some pink oyster spawn from a local farmer. Only problem was getting hardwood chips, literally only pine available. I’ve tried a Hay substrate with hydrated lime pasteurization, keen to see how it turns out. I add the spawn in a couple of hours 👍
Nice! Good luck with it all 🙂
Hi Kevin. How did that hay substrate work out? I’m growing my 1st. crop (pink oyster) on Straw and am having seasonal problems finding the straw. Thanks, Brent
I’ve found tremendous success using, of all things, the dead (after freezing) talk stalks of ornamental grasses. Just cut them into 2” or so pieces, place them in a large cooler, rinse them once then pour boiling water over them to cover. You may have to weight them down for absorption. Then just drain and layer into your buckets. I use 4 gallons that cat litter comes in. Works perfectly. Use your leftover bags that your mulch comes in. Perfect size. Then just toss em in the basement (yes you can stack them) and mist as appropriate. If you’re worried about chlorine in your water just fill a bucket with tap water and let it sit for a few days. The chlorine will evaporate. Or use rain water.
Can I do morrell Mushrooms like this or is there some other way to do those? I have the spores I just don’t want it to take a year like they say it does outside in the ground!
Tony
Thank You! For all your help, I have been successful with mushrooms in large part due to your information and products. It seems you do not provide the grain spawn any more, (I really liked your product) do you know of any others that provide spawn reasonable like you did? If so can you provide a list or suggest a few?
Personal use grower
Dan H
Hey Daniel! Glad you like the info 🙂 happy it has brought you mush success-
As for the spawn, we do not sell it at the moment, but if you send me an email (support@freshcapmushrooms.com) I will happily send you my recommendations for a good supplier!
Can you send me recommendations f or a good supplier of the spawn I live in North-east Oklahoma
Will adding gypsum make any difference and can I use hydrated lime for sterilisation?
Hey Kele! I doubt gypsum will make a difference, but I haven’t tested to be sure. And yes, you can use hydrated lime for wood chips 🙂
Hi Tony,
Thank you for the good info you keep sharing with us. As a new mushroom farmer I have learnt a lot from your articles and videos. I was wondering if you had any information on whether king oysters can be grown on straw and if so how to go about it? Thank you.
Or on pine shavings.
Hey there! Glad you like the videos! Yes, King Oysters can definitely be grown on straw, I have done it on straw logs. They do better on hardwood though.
Thanks for all of the info! I am going to try buckets with pasteurized straw with some Pink Oysters! I just inoculated rye grain so we will see if I did a good enough job of sterilizing. I appreciate all of your info and advice.
Hi! Tony, I’m impressed. Thank you for the information. I intend to start mushroom farming soon. Would you be able to guide me in Kenya? Thank you once again.
Hello, there is no aspen here (brazil), will it grow in pine or eucalyptus wood chips?
Hi Tony!
Thanks for the helpful article. I was wondering if once the mushrooms have finished flushing, can the mycelium from the old bucket be used as spawn for a new bucket?
You Gifs are broken+
Thanks for the heads up!
I’ve always had issues with the myco industry and the use of disposable plastic. I’ve used reusable totes and contamination rates seem to go up after repeated use.
I’ve have used large bleach baths and alcohol spray and wipe down.
What I’m wondering is how you like to clean your buckets and prep for reuse.
If you have a method that supports an efficient use of time for dozens of buckets I would love to hear that too.
Thanks for all that you share. ✌️
I live in Arizona. Where are some places to buy the mycelia (sp?)?
Just started this project a week and a half ago. Just noticed a dark liquid draining from the bottom of the bucket. Is that normal?
Do you think I could use a colonized oyster grow kit in the place of spawn? And cut or break it up into the Pasteurized hardwood chips?
Hey there! Yes, this will definitely work 🙂
Hi Tony,
Just came across this video and its been super informative! I think I am going to give this a shot. However, due to the COVID-19 situation I am trying to source my spawn from a local grower and all they have is elm oyster sawdust spawn…will that work in place of grain spawn? Thanks!
Hi Tony,
I am wondering how many lbs of mushrooms grow on the first flush from a 5 gallon bucket using this method of growing.
-Thank you
Hey Tony, this was super helpful!! Quick question that I haven’t been able to find (before ordering wood chips…) approx. how many pounds of wood chips would be needed per 5 gallon bucket?
Hi Tony,
Thanks for the post. A week ago, I miscalculated and had a bunch of oyster mushroom sawdust spawn left over from inoculating some logs, and i figured i’d try this method using the sawdust spawn. Surprisingly, about a week in, it looks like the bucket is on its way to colonizing. I did use a crap ton of sawdust spawn given the size of the bucket, so i’m thinking that has something to do with the apparent success. Yet, i was under the impression that sawdust on wood shavings was a bad idea. What do you think?
Thank-you for Share, will be much Help us to go Vegetable/Vegetaria with good Good/Real Food.
where is the best place to buy mushroom spawn in canada
Thank you very much for this article, I’m seriously thinking about trying it.
How many kilograms of mushrooms did you get from your best try?
could you do this with button mushrooms?
hey lauren! no, this would not work well with button mushroooms, best to do with Oysters. Lion’s Mane will also likely work
Great article, I’ve grown on logs for a few years but now my first couple buckets are showing pins! After a few flushes, is it possible to break up some of the bucket contents into new sterilized wood shavings to start a new bucket? I’m not yet set up for propagation on medium but I’d like to keep growing oysters without buying new spawn.
Hey there! I saw this article and really want to try it. Where do you suggest getting the spawn? Can’t wait!
Just ordered some grain spawn to try a bucket at home! Got a perfect spot on a side yard!
Regarding the myceliated “discs”, which I presume are the byproduct of the layers formed, can they be broken up and redistributed into a bucket again with more sterilized substrate?
I was wondering the same thing, wouldnt the mycelium keep growing and producing?
Do i need to water the chips once inside the bucket?
Hello, I am currently trying to grow oyster mushrooms for the first time. I am using 5-gallong buckets, aspen wood chips. I am worried that the 1/4″ drilled holes are too small. I have a bucket full of mycelium but nothing coming out of the drilled bucket holes (pinning). Am I being inpatient? Can I use some of the mycelium to inoculate my own grain to grow more buckets? or do I have to start with fresh grain spawn?
hello i am trying to start a mushroom growing set up for a school project, i was thinking of growing oysters or lion’s mane, do you know any good places to get spawn in california ?
Hey thanks again for the article! My bucket with blue oysters has been going for 23 days, appears fully colonized, but no pinning yet. It is relatively dry up here in central Oregon, but it’s still pretty humid inside the bucket. I moved the bucket out to the yard where it’s near a lawn sprinkler and in the shade where it will stay relatively cool during the day.
Any other thoughts on why I may not be fruiting?
Hi Brian, Im in the exact same boat as you. Wondering how things turned out.
Hi tony and thanks for the post and video. I have just had a good first harvest of NZ Oysters and they were delicious. I am now wondering how I should treat the holes to improve a 2nd spawn. Should I drill holes into the stem buds to make room for new growth or will it just grow on the previous stems?
Thanks!
I made some BRF cakes with Oysters and put them into Coco/Verm substrate which I then filled in transparent plastic buckets. They are currently colonizing in my basement. I hope they will also fruit. Unfortunately, I didn’t have enough spawn to fill a 20l (about 5gallon?) bucket so I went for two 5l (1.3 gallons) buckets. I hope they will fruit because I already have my next spawn colonizing its jars 🙂
Thanks for the good explanation (I did your PF Tek video’s instructions and then decided to go for a bucket instead of just fruiting the cakes directly and then I just combined several tutorials to what I described above).
hey Tony so I am using the hwfp method in buckets for blue oysters I am also trying a bucket of chestnut mushroom with hwfp. I thought I seen this will work with lions mane also I have the grain spawn was just looking for a tek that works with it… please let me know about the lions mane and chestnut… hopefully I didnt waste my chestnut grain spawn.
Is the coronavirus-like image “a nice cluster of pins” fake or not oyster mushrooms? Mine look like a brain spilling out of the hole instead of those nice pins. Also, all images I find online of fruiting oysters look like mine.
It took me a month from inoculation of my BRF cakes to getting my buckets out of the dark to fruit them. Since yesterday, they form fruits like crazy which is really satisfying. I was just confused that it doesn’t even remotely look like in your image.
Nope, that’s a real image! It is a weird one though, doesn’t always look like it.
Hi Tony and Tegan.
I came across your video for this after having a kit that didn’t flush as much as I would have liked and a second kit growing on it own. Firstly, thank you for offering the advice on growing in a 5 gallon bucket as it appears to be working however I’ve noticed my pins are not protruding from the bucket like the photos in your post. I’m getting maybe 4-5 mushrooms per hole and wondering if you have any recommendations on increasing pins/yield. The bucket is moist and I am spraying the pins to keep from drying out. My other question is once harvested or you have an area with aborted pins, do you remove the portion where you cut to allow additional mycelium to grow or will it grow through the previous?
Looking forward to hearing from you.
Hi Tony, love your channel.
Is 10 to 21C really the substrate incubation temperature for oysters in general?
“For Oysters on aspen wood chips at a spawn rate of 5-10%, it should take anywhere from 10-21 days to colonize fully.
Cooler conditions will slow the growth, but too warm and they will not grow at all. Anywhere from ~10 deg C- 21 deg C should be just fine.”
Could you use a plastic (or metal) 55-gallon food-grade one to grow them out of?
Hey Tony! I’m fruiting my buckets in a small green house, recycling the air a few times a day and spraying inside to create high humidity levels. I just harvested my first flushes this morning, the buckets still have some smaller cluster growing. I’m wondering, once I finish picking the rest, what do I do with the buckets? Do they have to “rest” outside of the fructification tent and then go IN again? Or I can leave them there all the way along?
Thanks for the knowledge!
Tony, thanks for all your info, I get a lot from your blogs and videos. Other than oysters and lions mane, are there other mushrooms that grow well with this method? reishi? enoki?
Hey Tony/fam, any tips here?
I checked my bucket after a week and saw the top casing covered in what I assume is cobweb mold. Any tips? This is my first time growing.
I sprayed some hydrogen peroxide on the mold, left the lid off for a few hours, and then scraped as much off as I could.
Below the top layer seems like healthy mycelium? It’s firm/white. But I am a newb so not sure.
I now put the bucket fully outside, still kept it covered, but also drilled one 1/4” hole in the middle of the lid.
Overall, this is how I’ve been following your steps: I have been keeping the bucket covered with a trash bag and spraying tap water 1-2 times. It stays around 75-95% humidity in the bag. It’s ~18C in the open porch where the bucket is.
What could I improve?
Follow-up: my guess is I misidentified the cobweb mold. Things are looking good with pins starting!
And luckily, I used very old hydrogen peroxide. So the top layer seems fine even with my intervention.
Hi Tony
Wonderful video, thanks
My grandchildren presented me with two packets of oyster mushroom pellets. Can I cultivate them on Aspen hardwood chips in a 5 gallon bucket following the instructions in your video.
Thanks
This is awesome! thank you for super clear instructions. I wanted to know if you can reuse the wood chips or need to start from scratch each time?
What do you recommend to use to clean the bucket after you remove the mycelium in order to reuse?
Hi Tony, I know it’s been a long time since you posted this, but I’ve just tried this out and it is working! The only problem is there are small black gnats. Is there a way to get rid of them?
Tony, I purchased grain spawn from fresh cap & I notice mycelium only in small portions of the bag. One bag only has mycelium growing in a spot about 2 inches in diameter. Is it going to be good to use in my bucket?
Interesting I want to give it a try
Hi Tony. Is the 5-10% spawn rate worked out on wet substrate or dry?
Hi Tony, thanks for the great article! I’ve been using this method for two months, have got about two flushes and really enjoy growing them.
I recently noticed black stains at the edge of some holes, and sometimes over the mycelium right behind the holes as well. I’m just wondering if that is something to worry about (bugs or contamination?). They did seem to be a bit sluggish after the first flush, but I suppose it could also be because of the weather (here in Ontario April was pretty windy, and sometimes I just forgot to take them inside …).
Thanks!
Hi,
I’ve tried this method and its going well, first pins appeared a few days ago. However, I lifted the bucket and had lots of long pins growing through the drainage holes. Any way I can stop this? I think the drainage holes are too big and they found perfect humidity on the bottom of the bucket!
Spawn suppliers recommendations? Location: South Jersey
Hey Tony;
Love your Video on Bucket Mushroom Growing. So many people make Mushroom growing so technical, my question is, I am a U.S.ARMY Disabled Veteran living in the Philippines, Can I use your Bucket method to grow Shiitake & Maitake mushrooms as it is Humid here and rains a lot, I have a big Perfect shaded place that is protected to grow them ? Unfortunately we do NOT have Oak here , but there is other hard woods and also Hulls like Rice Hulls ? Here because of the WOOD/TREE issue I will defiantly need a Growing Medium Mix, what do you recommend ?
And where can I Get the Bag strains or how can I propagate them myself ? I saw a guy once by a nice Shiitake mushroom, cut off the stem and set it cap Gills down on a piece of paper towel then set a bowl over it and left it there for a few hours, he captures the spores and cultivated them ? But I thought I would ask you ? Please let me know by e-mail ? Chileloco4@hotmail.com
Thanks Rob ~
I just came across your article on raising mushrooms in a five gallon bucket. I think my biggest problem will be getting the spawn. Can you tell me where I can get this? Also, I live north Georgia, so Have 2 months before first frost this year; can I make a batch this year be fore winter?